All the session videos from this year’s MacSysAdmin in Gothenburg, including my session are now online:
Hope you enjoy it!
All the session videos from this year’s MacSysAdmin in Gothenburg, including my session are now online:
Hope you enjoy it!
Greetings from Gothenburg, where I have been attending MacSysAdmin conference this week. I am humbled to be among the amazing line-up of speakers again. My thanks and congratulations to the organizers, speakers, sponsors, and, especially, attendees for another wonderful conference! See you all next year!
In other news, we got Catalina beta 9 earlier this week and then ‘GM seed’ yesterday. So, this also seems to be coming to a close. Several other Apple related updates as well.
If you would rather get the weekly newsletter by email, you can subscribe to the Scripting OS X Weekly Newsletter here!! (Same content, delivered to your Inbox once a week.)
Also note that if you are still using TextWrangler it will not run on 10.15! BBEdit is now free, the paid license or subscription will unlock more features.
There are no ads on my webpage or this newsletter. If you are enjoying what you are reading here, please spread the word and recommend it to another Mac Admin!
If you want to support me and this website even further, then consider buying one (or all) of my books. It’s like a subscription fee, but you also get a useful book or two extra!
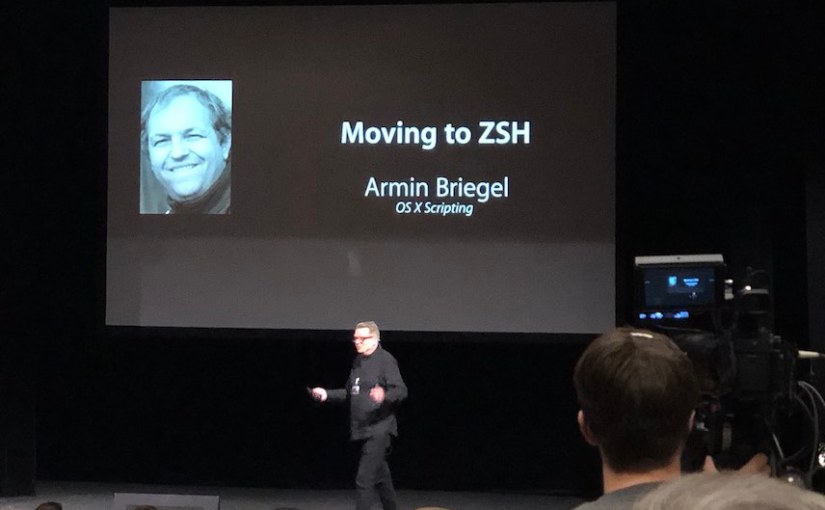
Once again, I had the honor to present at MacSysAdmin in Gothenburg. My topic this year was “Moving to zsh.”
I have created a supporting page with a link to the Keynote slide deck and all the other links and notes. Once the session video is up, I will add the link there as well.
Another week of releases. We got iOS 13.1, iPadOS and tvOS. Also a misnumbered Supplemental Update for macOS Mojave.
There was also the interesting incident of the Google Updater process that deletes the /var symbolic link, which shows how quickly the MacAdmin community can come together and solve an issue. Great work, everyone!
If you would rather get the weekly newsletter by email, you can subscribe to the Scripting OS X Weekly Newsletter here!! (Same content, delivered to your Inbox once a week.)
${VAR}:$_!% Comment 1: No, it’s _$${}VAR!$$ Comment 2: No, it’s [[{$VAR} == !*%&#$*#)#]] comment 3: No, it’s #&$!@[&#”[$^$#]@“?$(#$)&&=‘$_$&*’]($&)@:””There are no ads on my webpage or this newsletter. If you are enjoying what you are reading here, please spread the word and recommend it to another Mac Admin!
If you want to support me and this website even further, then consider buying one (or all) of my books. It’s like a subscription fee, but you also get a useful book or two extra!
I mentioned in my post on Customizing the zsh prompt, that you can get certain information from the git repository into the prompt or right prompt.
This subject has grown into a book: reworked and expanded with more detail and topics. Like my other books, I plan to update and add to it after release as well, keeping it relevant and useful. You can order it on the Apple Books Store now.
That post contains an example adapted from the ‘Pro git’ documentation which shows how to display the current branch and repo in the prompt.

Personally, I don’t like the Terminal window to be cluttered up with repeated information. While the information from the git repository does change over time, it does not change that frequently, and the information gets repeated over and over.
While I was researching the last post, which describes how to display the current working directory in Terminal’s window title bar, I learnt that you can also set a window title using a different escape code.
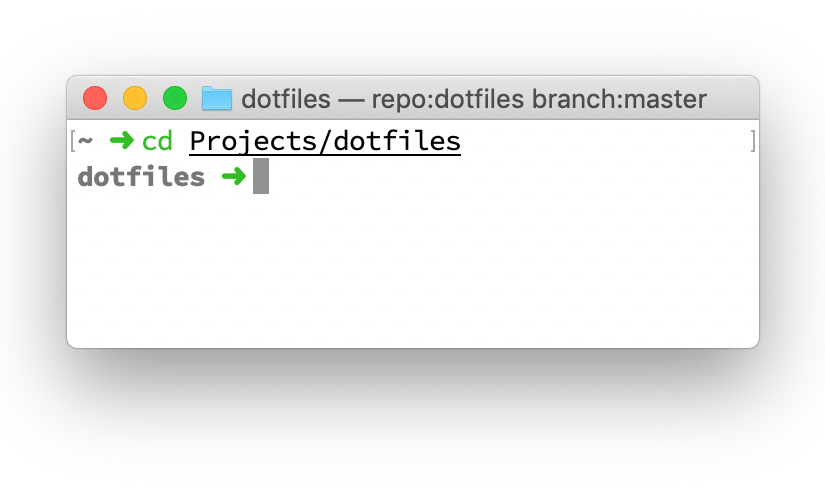
So, instead of repeating the git information on every prompt, we can show it in the window or tab title bar.

You can find the code to set this up in my dotfiles repository on Github. To use it make sure the git_vcs_setup file is in your fpath and load it in your .zshrc with
# Git status
autoload -U git_vcs_setup && git_vcs_setup
(More info on fpath and autoloading functions.)
Note that this file sets up two functions: update_terminal_window_title and update_terminal_tab_title. Terminal can have separate information titles for tabs and the entire window. When there are no tabs (or technically, just a single tab) Terminal displays both titles.
The status info above will show the repository, the current branch, a U when there are unstaged changes, and a S when there are staged, but uncommitted changes.
If you want more details in the status, you might want to consider using a more powerful solution to retrieve the git status, such as this project.
Apple’s release schedule this year is certainly not following any previous pattern.
After releasing a beta of iOS 13.1 during the beta phase of 13.0. Apple then announced that iOS 13.0 (for the iPhones) would be released on Sep 19 (yesterday) and iOS 13.1, together with iPadOS 13.1 on September 30. Yesterday, iOS 13.0 was released on schedule, but the release date for iOS and iPadOS 13.1 was moved ahead to September 24.
watchOS 6 was release yesterday alongside iOS 13, but only for Series 3 and up. While Series 1 and 2 watches will be supported by watchOS 6, they will have to wait for an update “later this year.”
Meanwhile, all we know about the Catalina release date is “October 2019.”
As the features and products become more and more intertwined and dependent on hardware, software, and cloud services, getting everything ready for release at the same time seems like an enormous, self-imposed burden.
Take, for example, the new Reminders application. All the new features in iOS 13 and Catalina means that the data is stored in a new format, which older versions of the Reminders application cannot read. Because of this, when you update your iPhone to the iOS 13, it will not synchronize with the Reminders app on the iPad or Mac, until you update those, which you cannot for several days or weeks.
Hypothetically, if Apple were to separate the Reminders app from the iOS release cycle, they could have waited for the update until all platforms, including iCloud, can support it. Users could then choose to update the app on all their platforms when it is convenient for them, without interrupting the user’s workflow.
Big feature laden software releases are a relic of the past when software was purchased on physical media in boxes. The big feature reveals at WWDC and then later at the release keynotes bring Apple a lot of attention and press. But, the chaos and delays (perceived and real) of the self-imposed release dates are not helping Apple’s reputation.
And yes, it is easy to criticize from the comfort of sitting behind my MacBook keyboard, while the amazing engineers and managers at Apple have to do all the work. There are probably people at Apple working this out in some way or another. Apple has put features into the interim “Spring” updates for High Sierra and Mojave and are deferring several features shown at WWDC to later versions of iOS 13 and Catalina.
How this continues to develop in the future will certainly be interesting.
If you would rather get the weekly newsletter by email, you can subscribe to the Scripting OS X Weekly Newsletter here!! (Same content, delivered to your Inbox once a week.)
:%!xxd to view the hex. Edit away and then %!xxd -r to switch back to the binary view. Save just like you would any other file in VIM.”altool docs have been updated to include the new --store-password-in-keychain-item option, which allows you to create a keychain item specifically for use in notarization scripts that use -p "@keychain:<item name>" ”“watchOS 6 is currently compatible with Apple Watch Series 3 and later. Apple Watch Series 1 and 2 will support watchOS 6 later this year.”
There are no ads on my webpage or this newsletter. If you are enjoying what you are reading here, please spread the word and recommend it to another Mac Admin!
If you want to support me and this website even further, then consider buying one (or all) of my books. It’s like a subscription fee, but you also get a useful book or two extra!
This subject has grown into a book: reworked and expanded with more detail and topics. Like my other books, I plan to update and add to it after release as well, keeping it relevant and useful. You can order it on the Apple Books Store now.
While I was working on customizing my zsh configuration files for my zsh article series, I noticed that Terminal would not display the current working directory when using zsh. it worked fine when I switched back to bash.
Note: showing the working directory in the window or tab title is enabled by default in Terminal. You can configure what Terminal shows in the title in the Preferences Window for each profile. Select a profile and
Some sleuthing showed me that /etc/bashrc_Apple_Terminal sets up a update_terminal_cwd function which sends some escape codes to Terminal to keep the window title bar updated. This file is sourced by /etc/bashrc for the Terminal.app.
In macOS 10.14 Mojave and earlier, this configuration file has no equivalent for zsh. /etc/zshrc has code that would load /etc/zshrc_Apple_Terminal, if it existed. However, this file does not exist in macOS Mojave and earlier.
It does in Catalina, though, and it sets up a similar function that is added into the precmd hook. If you have access to the Catalina beta, you can just copy the /etc/zshrc_Apple_Terminal to your Mojave (or earlier) Mac and it will work.
Alternatively, you can write your own implementation, which is what I did, because I wanted it before the Catalina files existed. My solution exists of the function and its setup in its own file. This file is in a directory that is added to the fpath so I can simply load it with autoload.
You can see the code for the function file here.
Then, in my .zshrc I load the function file with:
# path to my zsh functions folder:
my_zsh_functions=$repo_dir/dotfiles/zshfunctions/

# include my zshfunctions dir in fpath:
if [[ -d $my_zsh_functions ]]; then
    fpath=( $my_zsh_functions $fpath )
fi

# only for Mojave and earlier
if [[ $(sw_vers -buildVersion) < "19" ]]; then
    # this sets up the connection with the Apple Terminal Title Bar
    autoload -U update_terminal_pwd && update_terminal_pwd
fi
And from now, the title will be updated in Mojave (and earlier) and the function won’t even be loaded in Catalina.
This might seem a bit overkill, now that the functionality is in the Catalina file, but it might serve as a useful example when you want to customize, or re-implement similar behavior.
New iPhones! New Apple Watch! Even a new entry level iPad! The Apple iPhone event delivered mostly within expectations. I am not going to link all the detailed posts, you can go to Apple’s Newsroom for the official details.
We got release dates for iOS 13 (Sep 19), iOS 13.1 (Sep 30), iPadOS (Sep 30, unclear if this is iPadOS 13.0 or 13.1, but likely the latter) and macOS 10.15 Catalina (a vague ‘October’). (Check this MacStories post with all the dates, including hardware and services.)
So, there are a few extra weeks this year to test and prepare for the next macOS upgrade. It’ll be a busy fall either way. Make the most of it: Test, prepare, file bugs and feedback!
If you would rather get the weekly newsletter by email, you can subscribe to the Scripting OS X Weekly Newsletter here!! (Same content, delivered to your Inbox once a week.)
There are no ads on my webpage or this newsletter. If you are enjoying what you are reading here, please spread the word and recommend it to another Mac Admin!
If you want to support me and this website even further, then consider buying one (or all) of my books. It’s like a subscription fee, but you also get a useful book or two extra!
There is an updated version of this post for the new tools in Xcode 13.
The upcoming macOS 10.15 Catalina will require more apps and tools to be notarized. Apple has somewhat loosened the requirements at last minute, but these changed limitations are only temporary, to give developers more time to adapt.
Notarizing Mac Application bundles has its pitfalls, but is overall fairly well documented. However, I have been working on some command line tools written in Swift 5 and figured out how to get those properly signed and notarized.
Howard Oakley has written up his experiences and that post was extremely helpful. But there were a few omissions and some steps that aren’t really necessary, so I decided to make my own write-up.
And yes, there is a script at the end…
Note: these instructions are for macOS 10.14.6 Mojave, Xcode 10.3 and Swift 5.0. It is very likely that the details will change over time.
Update 2019-09-24: Tested with Xcode 11 and it still works (the screen layout has changed for some of the options)
That’s a longish list. If you are already building command line tools in Xcode, you should have most of these covered already. We will walk through the list step-by-step:
You need either the paid membership in the Apple Developer Program or be invited to an Apple Developer Enterprise Program team with access to the proper certificates.
You cannot get the required certificates with a free Apple Developer account, unless you are member of a team that provides access.
You can download Xcode from the Mac App Store or the developer download page. When you launch Xcode for the first time, it will prompt for some extra installations. Those are necessary for everything to in the article to work.
There are multiple certificates you can get from the Developer Program. By default you get a ‘Mac Developer’ certificate, which you can use for building and testing your own app locally.
To distribute binaries (apps and command line tools) outside of the App Store, you need a ‘Developer ID Application’ certificate. To sign installer packages for distribution outside of the Mac App Store, you need a ‘Developer ID Installer’ certificate.
We will need both types of Developer ID certificates, the first to sign the command line tool and the second to sign and notarize the installer package.
If you have not created these yet, you can do so in Xcode or in the Developer Portal. If you already have the certificates but on a different Mac, you need to export them and re-import them on the new Mac. Creating new certificates might invalidate the existing certificates! So beware.
Once you have created or imported the certificates on your work machine, you can verify their presence in the Terminal with:
% security find-identity -p basic -v
This command will list all available certificates on this Mac. Check that you can see the ‘Developer ID Application’ and ‘Developer ID Installer’ certificates. If you are a member of multiple teams, you may see multiple certificates for each team.
You can later identify the certificates (or ‘identities’) by the long hex number or by the descriptive name, e.g. "Developer ID Installer: Armin Briegel (ABCD123456)"
The ten character code at the end of the name is your Developer Team ID. Make a note of it. If you are a member of multiple developer teams, you can have multiple Developer ID certificates and the team ID will help you distinguish them.
Apple requires Developer Accounts to be protected with two-factor authentication. To allow automated workflows which require authentication, you can create application specific passwords.
Create a new application specific password in Apple ID portal for your developer account.
You will only be shown the password when you create it. Immediately create a ‘New Password Item’ in your Keychain with the following fields:
Developer-altoolThis will create a developer specific password item that we can access safely from the tools.
If you want, you can also store the app specific password in a different password manager, but the Xcode tools have a special option to use Keychain.
You may already have a project to create a command line in Xcode. If you don’t have one, or just want a new one to experiment, you can just create a new project in Xcode and choose the ‘Command Line Tool’ template from ‘macOS’ section in the picker. The template creates a simple “Hello, world” tool, which you can use to test the notarization process.
My sample project for this article will be named “hello.”
The default settings in the ‘Command Line Tool’ project are suitable for building and testing the tool on your Mac, but need some changes to create a distributable tool.
Before you can notarize the command line tool, it needs to be signed with the correct certificates.

Enabling the ‘Hardened Runtime’ will compile the binary in a way that makes it harder for external process to inject code. This will be requirement for successful notarization starting January 2020.
YES
If we want to automate the packaging and notarization, we need to know where Xcode builds the binary. The default location is in some /tmp subdirectory and not very convenient. We will change the location for the final binary (the ‘product’) to the build subdirectory in the project folder:
$SRCROOT/build/pkgroot
If you manage your code in git or another VCS, you want to add the build subdirectory to the ignored locations (.gitignore)
You can use Xcode to write, test, and command line tool debug your. When you are ready to build and notarize a pkg installer, do the following:
% xcodebuild clean installThis will spew a lot of information out to the command line. You will see a build subdirectory appear in the project folder, which will be filled with some directories with intermediate data.
After a successful build you should see a pkgroot directory in the build folder, which contains your binary in the usr/local/bin sub-path.
/usr/local/bin is the default location for command line tools in the Command Line Tool project template. It suits me fine most of the time, but you can change it by modifying the ‘Installation Directory’ build setting in Xcode and re-building from the command line.
Command Line Tools can be signed, but not directly notarized. You can however notarize a zip, dmg, or pkg file containing a Command Line Tool. Also, it is much easier for users and administrators to install your tool when it comes in a proper installation package.
We can use the pkgroot directory as our payload to build the installer package:
% pkgbuild --root build/pkgroot \
           --identifier "com.example.hello" \
           --version "1.0" \
           --install-location "/" \
           --sign "Developer ID Installer: Armin Briegel (ABCD123456)" \
           build/hello-1.0.pkg
I have broken the command into multiple lines for clarity, you can enter the command in one line without the end-of-line backslashes \. You want to replace the values for the identifier, version and signing certificate with your data.
This will build an installer package which would install your binary on the target system. You should inspect the pkg file with Pacifist or Suspicious Package and do a test install on a test system to verify everything works.
If you want to learn more about installer packages and
pkgbuildread my book “Packaging for Apple Administrators.”
Xcode has a command line tool altool which you can use to upload your tool for notarization:
xcrun altool --notarize-app \
             --primary-bundle-id "com.example.com" \
             --username "username@example.com" \
             --password "@keychain:Developer-altool" \
             --asc-provider "ABCD123456" \
             --file "build/hello-1.0.pkg"
The username is your developer account email.
The asc-provider is your ten digit Team ID. If you are only a member in a single team you do not need to provide this.
The password uses a special @keychain: keyword that tells altool to get the app-specific password out of a keychain item named Developer-altool. (Remember we created that earlier?)
This will take a while. When the command has successfully uploaded the pkg to Apple’s Notarization Servers, it will return a RequestUUID. Your notarization request will be queued and eventually processed. You can check the status of your request with:
xcrun altool --notarization-info "Your-Request-UUID" \
             --username "username@example.com" \
             --password "@keychain:Developer-altool"
Apple will also send an email to your developer account when the process is complete. I my experience this rarely takes more than a minute or two. (Being in Central EU time zone might be an advantage there). When the process is complete, you can run the above notarization-info command to get some details. The info will include a link that contains even more information, which can be useful when your request is rejected.
Note that the info links expire after 24 hours or so. You should copy down any information you want to keep longer.
You will not receive anything back from Apple other than the confirmation or rejection of your request. When a Mac downloads your installer package and verifies its notarization status it will reach out to Apple’s Notarization servers and they will confirm or reject the status.
If the Mac is offline at this time, or behind a proxy or firewall that blocks access to the Apple Servers, then it cannot verify whether your pkg file is notarized.
You can, however, ‘staple’ the notarization ticket to the pkg file, so the clients do not need to connect to the servers:
% xcrun stapler staple build/hello-1.0.pkg
You can also use stapler to verify the process went well:
% xcrun stapler validate build/hello-1.0.pkg
But since stapler depends on the developer tools to be installed, you should generally prefer spctl to check notarization:
% spctl --assess -vvv --type install build/hello-1.0.pkg
Obviously, I built a script to automate all this. Put the following script in the root of the project folder, modify the variables at the start of the script (lines 20–38) with your information, and run it.
The script will build the tool, create a signed pkg, upload it for notarization, wait for the result, and then staple the pkg.
You can use this script as an external build tool target in Xcode. There are other ways to integrate scripts for automation in Xcode, but all of this is a new area for me and I am unsure which option is the best, and which I should recommend.
These links and videos, especially Howard Oakley’s post and Tom Bridge’s PSU Presentation have been hugely helpful. Also thanks to co-worker Arnold for showing me this was even possible.
Notarization is a key part of Apple’s security strategy going in macOS.
As MacAdmins we will usually deploy software through management systems, where the Gatekeeper mechanisms which evaluate notarization are bypassed. There are, however, already special cases (Kernel Extensions) where notarization is mandatory. It is likely that Apple will continue to tighten these requirements in the future. The macOS Mojave 10.14.5 update has shown that Apple may not even wait for major releases to increase the requirements.
If you are building your own tools and software for macOS and plan to distribute the software to other computers, you should start signing and notarizing.
On the other hand, I find the introduction of Notarization to macOS encouraging. If Apple wanted to turn macOS into a “App Store only system” like iOS, they would not have needed to build the notarization process and infrastructure. Instead, Apple seems to have embraced third-party-software from outside the App Store.
Notarization allows Apple to provide a security mechanism for software distributed through other means. It cannot be 100% effective, but when used correctly by Apple and the software developers it will provide a level of validation and trust for software downloaded from the internet.
You can tell from the various articles and support posts that release day is definitely getting closer.
iOS 10.13.1 beta 2 was release and it is questionable if we will see another beta of either iOS, iPadOS or macOS before release. Apple has loosened notarization requirements for macOS Catalina temporarily (until Jan 2020) to help developer handle the transition.
If you would rather get the weekly newsletter by email, you can subscribe to the Scripting OS X Weekly Newsletter here!! (Same content, delivered to your Inbox once a week.)
There are no ads on my webpage or this newsletter. If you are enjoying what you are reading here, please spread the word and recommend it to another Mac Admin!
If you want to support me and this website even further, then consider buying one (or all) of my books. It’s like a subscription fee, but you also get a useful book or two extra!