Quite a bunch of links this time, because we were off for two weeks and this is the catch up summary. You can tell that most MacAdmins were able to take some time off as well, except for Howard Oakley (Eclectic Light) who just kept publishing like he always does. (Thank you for all your work, Howard!)
Fiora: “looks like dropbox doesn’t like me using dropbox as an automatic backup service… ” (Thread)
Jason Broccardo: “It’s 2020 and you know what that means, right? Adobe Flash Player dies at the end of this year!”
Roy van Rijn: “One of our office chairs turns off monitors… we couldn’t believe it, but we have it on tape. Surprisingly, there even is a known issue for it”
There are no ads on my webpage or this newsletter. If you are enjoying what you are reading here, please spread the word and recommend it to another Mac Admin!
If you want to support me and this website even further, then consider buying one (or all) of my books. It’s like a subscription fee, but you also get a useful book or two extra!
I had a great time while we were recording this podcast, even though we had to schedule it “way past my usual bedtime.” I hope you enjoy listening, as well!
I have pushed an update for the “Moving to zsh” book.
Just a few changes and fixes that have accumulated over the past two weeks. Much of this has been from feedback of readers. Thanks to everyone who sent in their notes.
The update is free if you have already purchased the book. You should get a notification from the Books application to update. (On macOS, I have seen that it can help to delete the local download of the book to force the update.)
If you are enjoying the book, please rate it on the Books store, or (even better) leave a review. These really help, thank you!
Also, please recommend the book to friends, co-workers, and anyone else (not just MacAdmins) who might be facing the zsh transition as they upgrade to Catalina.
The changes in v3 are listed here. This list is also in the ‘Version History’ section in the book. There, you will get links to the relevant section of the book, so you can find the changes quickly.
Added a section explaining how to work with upper- or lower-case strings in zsh scripts
Added a section explaining the differences in the read built-in command
Clarified the section on Connected Variables
Fixed file names in the table for Configuration Files and added a note for how to use configuration files with python environments
As usual, several typos and clarifications (Thanks to many readers)
Apple has started shipping Mac models that used to come with Mojave pre-installed with Catalina. If your organization has blockers for Catalina (incompatible software, etc.) you may want to install Mojave on these Macs. Unfortunately, this is not so easy.
Important Notice: these instructions will only work for Mac models that can boot to Mojave. Usually a Mac requires at least the version of macOS that the model shipped with when it was introduced. As of this writing, all new Macs require at least Mojave. The exceptions are the iMac Pro (High Sierra) and the MacBook Pro 16“ and the Mac Pro (2019) which both require Catalina. You cannot use these instructions to force a Mac Pro or MacBook Pro 16” to boot to Mojave. Any new Mac models that Apple introduces from now on, will also require Catalina and cannot be downgraded to Mojave.
(Not meant as a challenge. I am aware that someone might be able to hack together a Chimera Mojave with Catalina drivers. These ‘solutions’ are not supportable on scale.)
Directly downgrading from Catalina to Mojave with the startosinstall --eraseinstall command will fail. Attempts to run the Mojave installer from a Catalina Recovery (local or Internet) will also fail. The reason seems to be that the Mojave Installer application chokes on some aspect of Catalina APFS. Apple is likely not very motivated to fix this.
So far, the recommendation has been to boot to Internet Recovery with the shift-command-R key combination at boot. This used to boot to a Mojave (more specfically, the system the Mac shipped with) recovery system, and then you can wipe and re-install Mojave. However, if a Mac was shipped with Catalina pre-installed, it will boot to Catalina Internet Recovery, regardless of whether the Mac can boot to Mojave or not.
We have to get creative.
External USB Installer
The solution requires a Mojave Installer USB disk. First download the latest Mojave installer. You can do so from by following this App Store link. If you are running Catalina, you can also use the new option in softwareupdate:
This will delete the target volume data on the USB disk.
Enable External Boot
To boot a new Mac with a T2 chip off an external drive, you need to allow external boot from the Security Utility in the Recovery partition. This utility is protected and requires the password of a local administrator user to access. When you get a new Mac “out of the box,” you cannot directly boot to Recovery to change this.
Instead, you have to boot to the pre-installed Catalina, work your way through the Setup Assistant, and create a local administrator user before you can boot to Recovery to change this setting.
You also need to connect the Mac to a network with non-filtered/proxied access to Apple’s servers, either with Wifi or an ethernet adaptor. You can see which services and servers the network needs to be able to access in this kbase article. You will definitely need the servers listed under ‘Device Setup’ from that list and many of the others, depending on your deployment workflow.
This network connection is required to verify the integrity of the system on the USB Installer drive. You could also disable ‘Secure Boot’ entirely, but that is not recommended as it will, well, disable all system security verifications.
Now, reboot the Mac and hold the option key, from the list of devices to boot from, select the Mojave Installer drive. Once booted to the Mojave installation drive, start Disk Utility. In Disk Utility, erase the entire internal drive. You may have to choose ‘Show All Devices’ from the View menu to be able to select the internal drive with all sub volumes, not just the system or data volume.
Then you can quit Disk Utility and start the Mojave installation process.
After completing the installation, you want to remember to return to Recovery and re-disable external boot again. However, you need to create a new admin account on the disk before you can do that…
Avoiding the Downgrade
This is obviously tedious and really hard to automate. (I have been wondering if you could build a MDS workflow, but this one would require at least three reboots.)
The preferred solution is for IT departments and organizations to have the workflows and infrastructure in place to support and use “latest macOS” (Catalina). Apple is discouraging system downgrades or using anything but “latest macOS.” On newer hardware — like the MacBook Pro 16″, Mac Pro 2019, and every new Mac Apple will introduce from now on — downgrading to Mojave is not possible at all, so you have to support Catalina when you (or your users) get those Mac models.
As mentioned before, I do not believe there is much motivation at Apple to simplify this particular workflow. It serves Apple’s interest and vision to push the latest macOS over previous versions. From a user perspective it allows better integration with their iOS and other Apple devices. From a security standpoint it provides the latest security updates and patches. Apple provides security updates for the previous two macOS versions, but those notoriously do not fix all the vulnerability that the latest macOS gets.
However, in some cases you may have blocking applications that cannot run, or cannot be upgraded to run on Catalina. Then this workflow can be a ‘last ditch’ solution until you get those ‘blockers’ sorted out.
Maybe the best solution is to use this complex and work intensive downgrade workflow as leverage to push for “latest macOS” support in your organization.
Thanks to Robin Lauren and Mike Lynn for figuring this out on MacAdmins Slack and sharing their results.
We are close to completing another trip around the sun. Whether you use the solstice (Dec 22) or the Perihelion (Jan 5) or the quaint Gregorian Calendar which switches on Dec 31.
(Dates are for UTC. The exact astronomical event may be it may be a Dec 4 or Jan 4 at your location, depending on your time zone.)
You’d think that Apple would take an early break after the Mac Pro release, but we got new and updated security documentation. Together with the new deployment and MDM documentation updated last week.
Because of the holidays, this newsletter will be taking a break as well. The next one should be on Jan 10, 2020, summarizing everything that happened in the mean time.
I wish you Happy Holidays and all the best for the new Year 2020!
See you next year!
Armin Briegel
Note: if you get an AppStore/iTunes Gift Card for Christmas, gift yourself one of my books!
This is a good summary, but I find the continued expectation that Apple has to keep delivering “Blockbuster” devices quite tiresome. Who else is has delivered blockbuster devices? Also, the statement implies that the iPad, Apple Watch, and AirPods (all introduced since 2010) aren’t blockbusters?
Jean-David Gadina: “You can keep SIP but allow debugging (including instruments) with csrutil enable --without debug --without dtrace”
Russ Bishop: “TIL: 3rd party kext tries to inject macOS dylib into all processes, breaks downloaded simulators. Surprise! Simulator binaries can’t load mac dylibs. So far that’s four unique ways I’ve seen badly made kernel extensions break simulators. All are ”security“ products.”
There are no ads on my webpage or this newsletter. If you are enjoying what you are reading here, please spread the word and recommend it to another Mac Admin!
If you want to support me and this website even further, then consider buying one (or all) of my books. It’s like a subscription fee, but you also get a useful book or two extra!
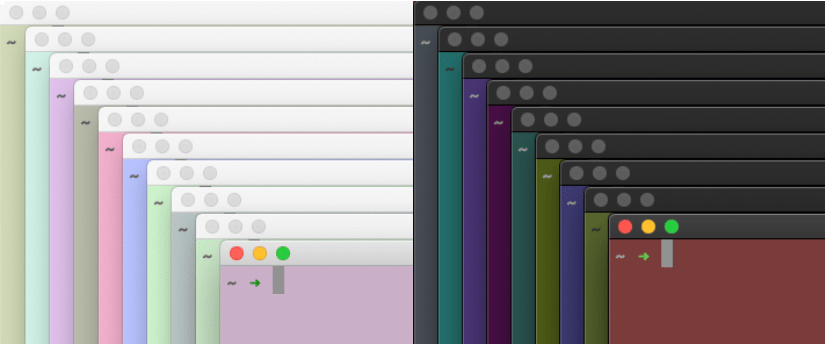
While I have used this for a long time, the limited number of colors has always annoyed me. And with the introduction of Dark Mode in macOS it seemed just not useful anymore.
Mike’s approach to create the color files with a python script sent me down a rabbit hole to recreate this in Swift. I actually succeeded in creating such a Swift tool, but then, when I worked on connecting the tool with Terminal, I found an even simpler, and arguably better way to do this.
Surprisingly, it involved AppleScript.
Changing the Terminal Background color
Terminal has a powerful AppleScript library, which allows to read and change (among other things) the background color of a Terminal window or tab:
tell application "Terminal"
    get background color of selected tab of window 1
            --> {65535, 65533, 65534}
end tell
The background color is returned as a list of three RGB numbers ranging from 0 to 65535 (216 – 1). You can also set the background color:
tell application "Terminal"
    set background color of selected tab of window 1 to {60000, 45000, 45000}
end tell
This will set the background color of the current window to pastel pink (salmon?).
Armed with this knowledge it is fairly straight forward to write a script that will set the background color to a random color:
#!/usr/bin/osascript

on backgroundcolor()
    set maxValue to (2 ^ 16) - 1

    set redValue to random number from 0 to maxValue
    set greenValue to random number from 0 to maxValue
    set blueValue to random number from 0 to maxValue

    return {redValue, greenValue, blueValue}
end backgroundcolor

set newcolor to backgroundcolor()

tell application "Terminal"
    set the background color of the selected tab of window 1 to newcolor
end tell
You can paste this code in Script Editor and hit the ‘play’ button and watch the Terminal window change. But since we want to use from within Terminal, we will take a different approach: paste the code into your favorite text editor and save it as a text file named randombackground (no extension).
Then open Terminal and change directory to where you save the file and set its executable bit:
> chmod +x randombackground
Now you can run this AppleScript file like any other script file from Terminal:
> ./randombackground
This is fun!
I am not the first to discover and use this, Daniel Jalkut and Erik Barzeski have documented this in 2006.
Enter Dark Mode
Fast forward back to 2018: Along with the rest of macOS, Terminal gained “Dark Mode” in macOS Mojave.
The default “Basic” window profile in Terminal has black text on a white background in light mode and white text on a black background in dark mode. There is some “magic” that happens when the system switches to Dark or Light mode.
However, once we customize the background color (or any other color) the magic does not work any more. When our random backgrounds are too dark in light mode (or vice versa), they don’t really look nice any more, and the text becomes hard to read or completely illegible.
So, we want to change the script to detect dark or light mode and limit the colors accordingly. You can detect dark mode in AppleScript with:
tell application "System Events"
  get dark mode of appearance preferences
end tell
This will return true for dark mode and false for light mode. We modify the script to use just a subrange of all available colors, depending on the mode:
#!/usr/bin/osascript

on backgroundcolor()
    set maxValue to (2 ^ 16) - 1
    tell application "System Events"
        set mode to dark mode of appearance preferences
    end tell

    if mode then
        set rangestart to 0
        set rangeend to (maxValue * 0.4)
    else
        set rangestart to (maxValue * 0.6)
        set rangeend to maxValue
    end if

    set redValue to random number from rangestart to rangeend
    set greenValue to random number from rangestart to rangeend
    set blueValue to random number from rangestart to rangeend

    return {redValue, greenValue, blueValue}
end backgroundcolor

set newcolor to backgroundcolor()

tell application "Terminal"
    set the background color of the selected tab of window 1 to newcolor
end tell
When you run this from Terminal for the first time, it may prompt you to allow access to send events to “System Events.” Click ‘OK’ to confirm that:
Automatically setting the background color
Now we can randomize the color by running the command. For simplicity, you may want to put the script file somewhere in your PATH. I put mine in ~/bin/, a folder which a few useful tools and I also added to my PATH(in bash and in zsh).
It is still annoying that it doesn’t happen automatically when we create a new window or tab, but that is exactly what the shell configuration files are for. Add this code to your bash or zsh configuration file.
# random background color
if [[ $TERM_PROGRAM == "Apple_Terminal" ]]; then
    if [[ -x ~/bin/randombackground ]]; then
        ~/bin/randombackground
    fi
fi
Our script will likely fail when the shell is run in any other terminal application or context (such as over ssh). The first if clause checks if the shell is running in Terminal.app. Then the code check to see if the script exists and is executable, and then it executes the script.
This will result in random Terminal colors, matching your choice of dark or light mode.
Note: macOS Catalina added the option to automatically switch the theme depending on the time of day. This script will detect the mode correctly when creating a new window, but Terminal windows and tabs that are already open will retain their color. I am working on a solution…
Christmas for Mac users came early this year. At least for those Mac users who can afford a new Mac Pro. Whether you think the price is justified or not, whether you would like an Apple tower Mac or think desktops are so last decade, the Mac Pro (and the new MacBook Pro 16“) symbolizes a new desire from Apple to re-focus on the ”Pro” users. It remains to be seen if Apple’s vision of what Pro users need and want matches the reality.
Those who don’t get a shiny new Mac Pro, still got updates this week. macOS Catalina 10.15.2, iOS 13.3 and its various sibling updates dropped this week as well.
Do you know that you can gift Apple Books? If you are looking for last minute gift ideas for that Terminal using friend, family member, or co-worker of yours, give them some know-how and increased productivity: “Moving to zsh”
Rich Trouton: “The book I wrote with @cedge318 has been available for pre-order, but it looks like we’re getting close to a release date of January 3, 2020! For folks with a shiny new Amazon gift card this Christmas, why not treat yourself to the gift of knowledge?” Amazon US, UK, DE (Affiliate Links)
Victor (groob): “Maybe next time @Apple will consider shipping a few review models to enterprise customers who need to make sure these are ready for users. Priorities…”
Pepijn Bruienne: “It’s official! iOS and iPadOS 13.3 now support FIDO2/Webauthn for NFC, USB and Lightning-based security keys for everyone. Get a key, start enabling FIDO2 with services that support it and ask those who don’t what their timeline for adoption is.”
Graham Pugh: “Fun fact: Apple even renewed the certificate in the Java for OSX 2017–001 installer. And there is still software out there that needs it…”
Mike Boylan: “New Deployment Reference Guide for Mac has been posted! As promised, the FileVault and SecureToken section has been updated to include information about the Bootstrap Token and some subtle behavior changes in Catalina.”
Kyle Crawford: ““On Mac computers, software updates deferral restriction applies to OS updates only. iTunes, Safari, security updates, or other supplemental updates for macOS aren’t restricted.”!”
There are no ads on my webpage or this newsletter. If you are enjoying what you are reading here, please spread the word and recommend it to another Mac Admin!
If you want to support me and this website even further, then consider buying one (or all) of my books. It’s like a subscription fee, but you also get a useful book or two extra!
String comparison in most programming languages is case-sensitive. That means that the string 'A' and 'a' are considered different. Humans usually don’t think that way, so there is bound to be trouble and confusion.
If you are looking at single letters, the bracket expansion can be quite useful:
case $input in
    [aA])
        # handle 'a'
        ;;
    [bB])
        # handle 'b'
        ;;
    [qQ])
        # handle 'q': quit
        exit 0
        ;;
    *)
        echo "Option is not available. Please try again"
        ;;
esac
However, for longer strings the bracket expansion gets cumbersome. To cover all case combinations of the word cat you need [cC][aA][tT]. For longer, or unknown strings, it is easier to convert a string to uppercase (all capitals) or lower case before comparing.
sh and bash3
Bash3 and sh have no built-in means to convert case of a string, but you can use the tr tool:
name="John Doe"
# sh
echo $(echo "$name" |  tr '[:upper:]' '[:lower:]' )
john doe

# bash3
echo $(tr '[:upper:]' '[:lower:]' <<< "$name")
john doe
Switch the [:upper:] and [:lower:] arguments to convert to upper case.
There are many other tools available that can provide this functionality, such as awk or sed.
Bash 5
Bash 5 has a special parameter expansion for upper- and lowercasing strings:
name="John Doe"
echo ${name,,}
john doe
echo ${name^^}
JOHN DOE
% name="John Doe"
% echo ${(L)name}
john doe
% echo ${(U)name}
JOHN DOE
In zsh you can even declare a variable as inherently lower case or upper case. This will not affect the contents of the variable, but it will automatically be lower- or uppercased on expansion:
% typeset -l name
% name="John Doe"
% echo $name
john doe
% typeset -u name
% echo $name
JOHN DOE
In this post, I will describe how to build a simple Mac app which runs a shell command using SwiftUI.
SwiftUI is the new framework from Apple to build user interfaces across platforms. Applications built with Swift UI will require 10.15 Catalina and higher. As you will see, SwiftUI does simplify a lot of the work of creating the user interface. I believe that learning SwiftUI now will be a good investment into the future.
I have written this post with Xcode 11.2.1 on macOS Catalina 10.15.1. That means we are using Swift 5.1. You can download Xcode from the Mac App Store or Apple’s developer page.
In this post, we will be using the say command to make the Mac speak. You can test the command by opening the Terminal and entering
> say "Hello World"
The say command is a simple and fun stand in for other command line tools. It also provides instant feedback, so you know whether it is working or not. That said, when you want to provide text-to-speech functionality in a Swift app, you should probably use the text-to-speech frameworks, rather than sending out a shell command.
Nevertheless, for Mac Admin tasks, there are some that are only possible, or at least much easier, with shell tools.
First: Swift UI hello world
Before we get to more complicated things, let’s honor the classics and build a “Hello, World” application using Swift UI.
Open Xcode and from the project picker select “New Project.”
In the template chooser select ‘macOS’ and ‘Application’. Then click ‘Next.’
In the next pane, enter a name for the project: “SayThis.” Verify the other data and make sure the choice for ‘User Interface’ is ‘SwiftUI’. Then click ‘Next.’
The window with the new project will have four vertical panes. You can use the controller element in the top right of the toolbar to hide the right most “Inspector” pane as we will not need it.
Click it the “Play” button in the top left to build and run the template code, a window should open which show the place holder text “Hello World!”
When you return to Xcode the preview pane on the right should now be active and also display the “Hello World!” text. If it does not there should be a “Resume” button at the top of the preview pane (also called “Canvas”) which you can click to make Xcode resume live updating the preview. There are many situations that will stop Xcode from continuously updating the preview and you can click this button to resume.
The left column shows a list of files in this project. Select the ContentView.swift file. This file contains the Swift UI code that sets up the interface. You will see the code in the center pane. The relevant part of the code is:
struct ContentView: View {
    var body: some View {
        Text("Hello, World!")
            .frame(maxWidth: .infinity, maxHeight: .infinity)
    }
}
The ContentView contains a body which contains a Text element with the text Hello World!. at the end of the Text object, you a ‘modifier’ that sets the frame of the Text object to use all available space.
Hello, me!
In the code pane, change World to something else:
Text("Hello, Armin!")
You will see that the text in the preview pane updates as you change the code.
Note: there are several reasons Xcode might stop updating and when it does, you will have to hit the ‘Resume’ button above the preview pane.
The preview pane or canvas allows you to edit as well. When you (command) ⌘-click on the “Hello, …” text in the canvas, you will get an “Action menu.”
The first item in the action menu: “Show SwiftUI Inspector” will an inspector with the attributes or “modifiers” of the text object. Note that, even though there is no visual indication, the inspector view can be scrolled to reveal more options.
Change the font of the text to Body. The preview in the canvas will update, as well as the code. The code will now look like:
I have broken the modifiers into their own lines for clarity.
Stacking it up… or down… or sideways…
The SwiftUI body can only contain one object. But there are SwiftUI objects that you can use to group multiple objects together. Command-Click on the text and choose “Embed in VStack” from the action menu.
The VStack stands for ‘vertical stack.’ The VStack and its sibling the HStack (horizontal) can contain multiple objects. So, you can add another Text over our “Hello” text:
This adds the "SayThis" text above the "Hello, ..." text in a larger font. I have also moved the .frame(...) modifier to the VStack because that leads to a nicer output. Feel free to apply the .frame modifer to different objects to see how that affects the layout.
The text is a little bit close together, so we can add some .padding() modifiers:
You can choose to change the properties using the inspector UI or in the code. Either way the changes should be reflected in the canvas and the code.
Adding some interaction…
Now we want to add some interaction. Eventually, we want the user to be able to enter some text, which will be sent to the say command. Before we get, we will add a field, to enter some text.
To add a TextField where the user can enter text to the layout, click on the + icon in the top right of the tool bar. A window will appear with SwiftUI objects. Enter TextField in the search area to find the TextField object and drag it between the two text items.
You will want to add a .padding() modifier to the text field as well.
We also need a local variable in our ContentView to store the value of the TextField. Add this variable declaration under the struct ContentView definition and before the body declaration:
@State var message = "Hello, World!"
This adds and initializes a variable named message. The @State marker tells SwiftUI this ‘State’ variable will be used with the view. The variable is part of the ‘state’ of the view. Changes to the variable will immediately update the UI and vice versa.
Use the message variable for the TextField and Text objects:
@State var message = "Hello, World!"

var body: some View {
    VStack {
        Text("SayThis")
            .font(.largeTitle)
            .padding()
        TextField("Message", text: $message)
            .padding()
        Text(message)
            .font(.body)
            .padding()
    }.frame(maxWidth: .infinity, maxHeight: .infinity)
}
When you look at this interface in the preview pane, you will see that the contents of the message variable are reflected in the TextField and Text. To test the interactivity, you need to either ‘build and run’ the application or hit the ‘Play’ button in the preview. Then you can change the text in the text field and immediately see the changes displayed in the Text below.
Declaring the message variable as a @State will automatically set up all the notifications for these seamless updates.
Buttons and Actions
While updating another object is quite cool, it is not what we set out to do. Let’s get back on track.
Remove the last Text(message) and all its modifiers.
Command-click on the TextField and use the action menu to embed it in an HStack (horizontal stack)
Drag a Button from the object Library (you can open this with the ‘+’ button in the top right of the window) next to the text field
You can change the label of the button by changing the Text object inside of it. Change "Button" to "Say". You also want to add a .padding() modifier to the button.
The preview should now look like this:
The action of the Button is a code block that will be run when the button is clicked. Add the code between the action closure brackets:
This uses the run() convenience method of the Process class. You need to provide the full path to the command line tool. You can determine the full path in Terminal with the which command:
> which say
/usr/bin/say
The arguments to the say command need to be provided as an Array of Strings. The process is launched asynchronously, so the main thread continues immediately. We can also provide a code block that will be executed when the Process terminates. For now, we have no code that needs to be run on termination, so we set the terminationHandler to nil.
Note: using the try! statement to crash when this method throws an exception is lazy. I use it here to simplify the code drastically. Process.run() will throw an error when the file at exectableURL does not exist or is not executable. We can be fairly certain the /usr/bin/say executable exists, so the try! statement is justifiable. You should probably add proper error prevention and handling in production code.
Updating the Interface
The say command is executed asynchronously. This means that it will be running in the background and our user interface remains responsive. However, you may want to provide some feedback to the user while the process is running. One way of doing that, is to disable the ‘Say’ button while the process is running. Then you can re-enable it when the process is done.
Add a second @State variable to track whether our process is running:
@State var isRunning = false
Add a .disabled(isRunning) modifier to the Button. This will disable the button when the value of the isRunning variable changes to true.
Then we add a line in the Button action code to set that variable to true. We also add a code block to the terminationHandler which sets its value back to false:
The days are getting shorter and darker… At least here in the northern hemisphere, the readers south of the equator can please stop gloating. Still no sign of the Mac Pro and the Pro Display XDR, which were promised “Fall 2019.” Apple has done this before, when they released the iMac Pro in the last business week of 2017.
The beta 4 for iOS 13.3 just dropped. I get the feeling it’ll be another few frantic weeks at Apple before the end of the year!
Tim Sutton: “Til brew-cask has a --no-quarantine flag; especially helpful if are weird like me and sometimes use it to install binaries that aren’t notarized: brew cask install jtool --no-quarantine”
Greg Neagle: “Last call for testers! Munki 4 is likely to be released next week. Test the current beta in your environment and file issues!”
Jamf: “ICYMI, the Jamf Online Training Catalog is now open to all Jamf customers! With over 100 modules and 15 series of content, the catalog is structured to help you learn about JamfPro, JamfConnect or JamfSchool anytime and anywhere. Jamf Online Training”
Kyle Crawford: “Did you know that user-approving kexts on Catalina requires admin rights?!!”
There are no ads on my webpage or this newsletter. If you are enjoying what you are reading here, please spread the word and recommend it to another Mac Admin!
If you want to support me and this website even further, then consider buying one (or all) of my books. It’s like a subscription fee, but you also get a useful book or two extra!